Isstvan III pt. 2
Battle Missions
The following six mission types represent the bulk of the fighting that occurred on Isstvan III and are intended to be used for the majority of games played in the various phases of the campaign, representing the brutal brother-on-brother fighting of the Isstvan III Atrocity.
Unless specified differently in this section, all the rules and advice given in the Age of Darkness rulebook also apply to fighting Isstvan III battle missions.
In all cases, in addition to the listed victory conditions for any particular Isstvan III battle mission, completely destroying the enemy force is always a victory.
THE ARMIES
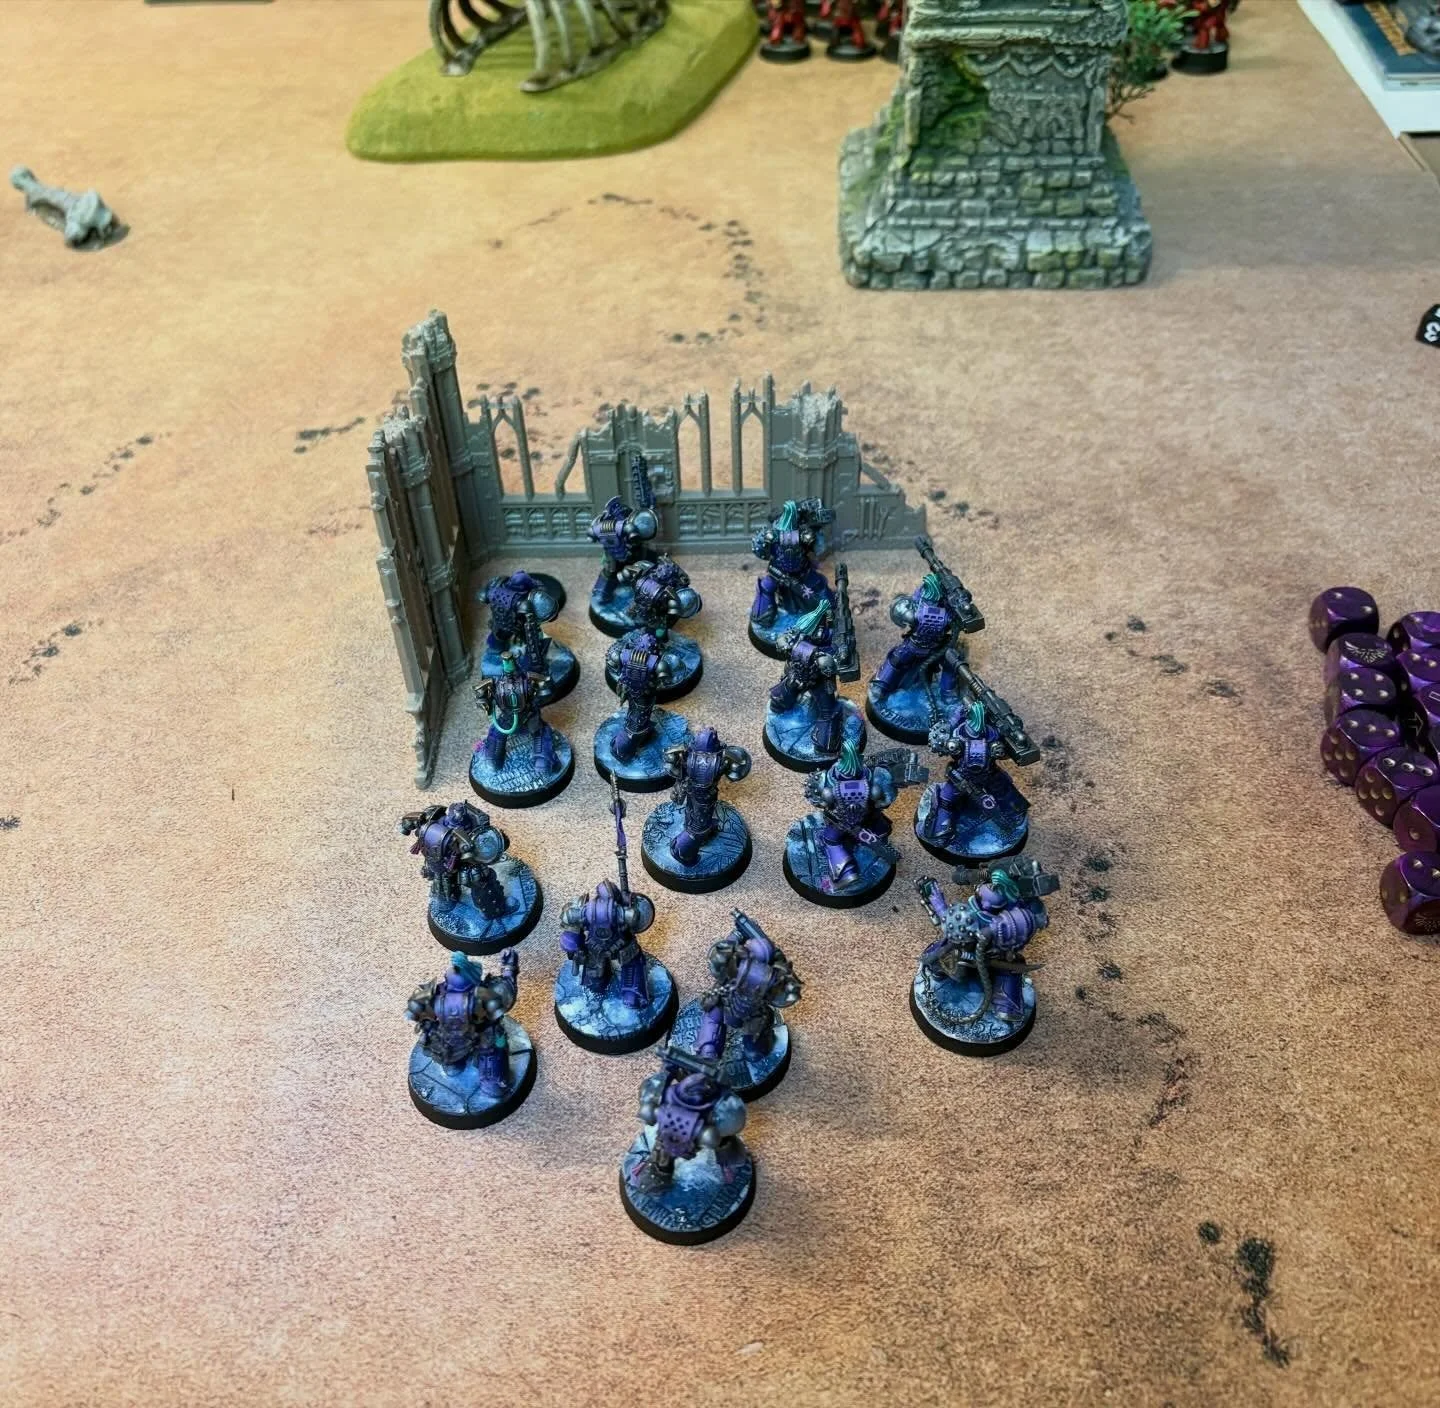
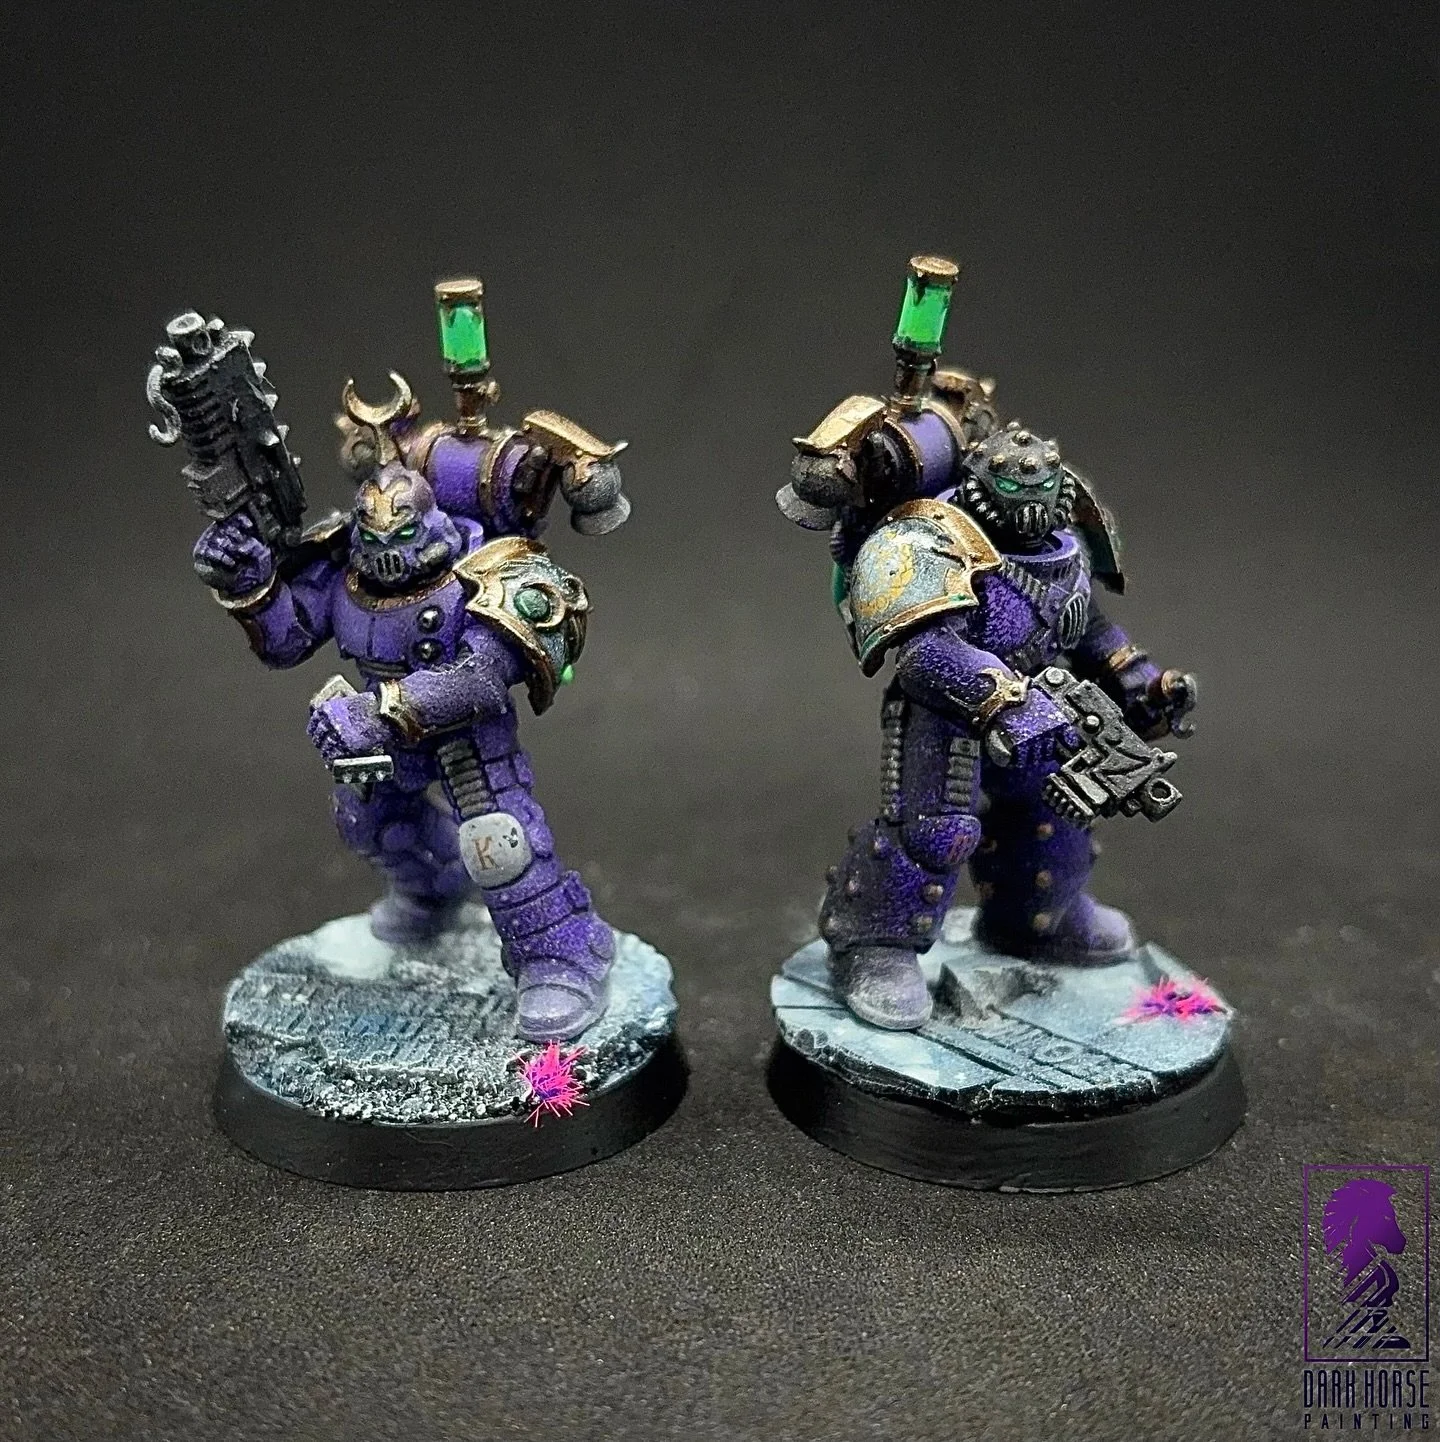
The armies chosen for these games should be taken from the Sons of Horus, Emperor's Children, World Eaters and Death Guard Legions.
The Primarchs Angron, Horus, Fulgrim and Mortarion are available only to players on the Traitor side. No matter how many players are on a particular side, no more than one of each Primarch may be taken, regardless of the size of battle.
Note (Traitors): Traitors did have access to Titans on Isstvan III but in 3rd Edition, games using Titans utilize specific missions. Since the Loyalists did not have Titans, it is only fair to not include them here.
Note (Loyalists): Logically, Loyalists would not have access to Vehicles of the Flyer Sub-Type, Drop Pods, Termites, etc. There are no formal restrictions, but use common sense and have the conversation with your opponent if you want to field something like this.
Note (Both): To illustrate the Loyalist resistance in the void, other factions (mortals/Mech) could be used in Zone Mortalis missions.
Size of Game
In 1st edition, Isstvan III battle missions were intended for use with armies of 1,500-2,500 points. I see no reason not to play 3k games with these rules The players involved should agree on the points limit in advance.
Special Characters
There were a number of special characters present on Isstvan III. At the moment, I will not provide a list. If they were there, feel free to use them. If you know they weren’t, don’t.
Allied Detachments
You may take Allied Detachments, but they must be from the legions presented.
Fortifications
The use of Fortification detachments may be restricted or increased depending on the Campaign phase being played, otherwise the standard rules for fortification selection and deployment found in the Legacies of the Age of Darkness (PDF) are used.
THE MISSIONS
Roll randomly or agree mutually.
D6 Mission Type
1 Blood Feud
2 Fire Tide
3 Shatter Strike
4 Onslaught
5 Dominion
6 Extermination
THE BATTLEFIELDS
Place terrain IAW 3rd edition rules, unless otherwise stated in the mission.
D6 Deployment Map Type
1 Clash of the Line (see below)
2 Dawn of War (see page 305, Age of Darkness Rulebook)
3 Search and Destroy (see page 305, Age of Darkness Rulebook)
4 Hammer and Anvil (see page 305, Age of Darkness Rulebook)
5 Ambush! (see below)
6 Vanguard Strike (see below)
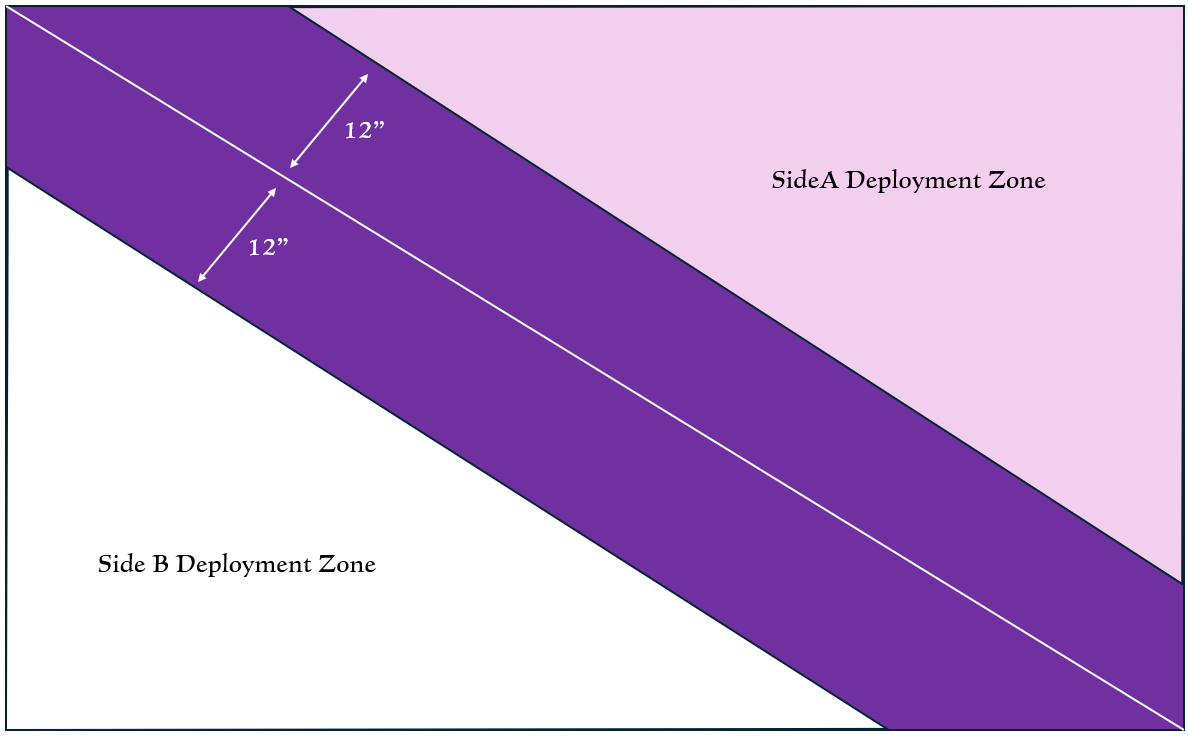
Clash of the Line
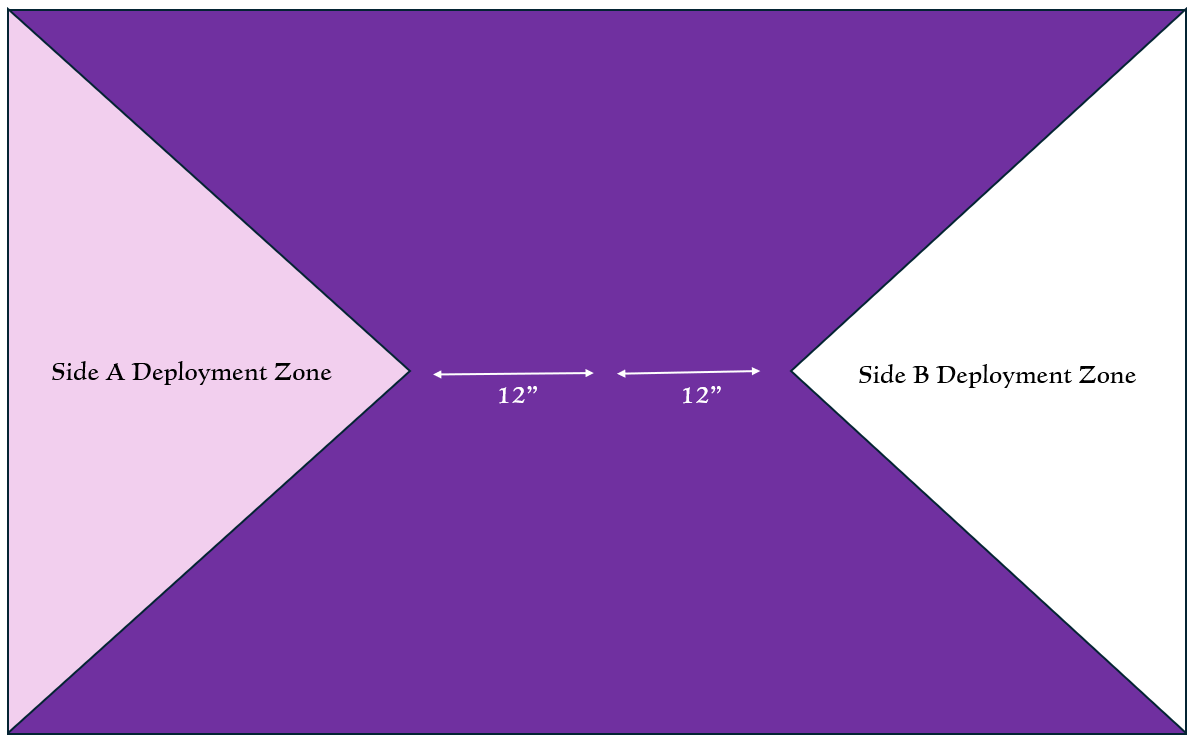
Clash of the Line
Ambush!
The Ambush deployment divides the table into two deployment areas: a central defender's area (representing the force being ambushed) and two deployment areas on the narrow table edges which are both available to the opposing player, representing the 'attacking' forces that have set up the ambush.
The player winning the roll-off may opt to take the part of the Attacker or the Defender, their opponent then takes the opposing deployment type.
The narrow table edges are the Attacking player's while the long table edges are the Defending player's (with any of the Defender's reserves entering by the long edges).
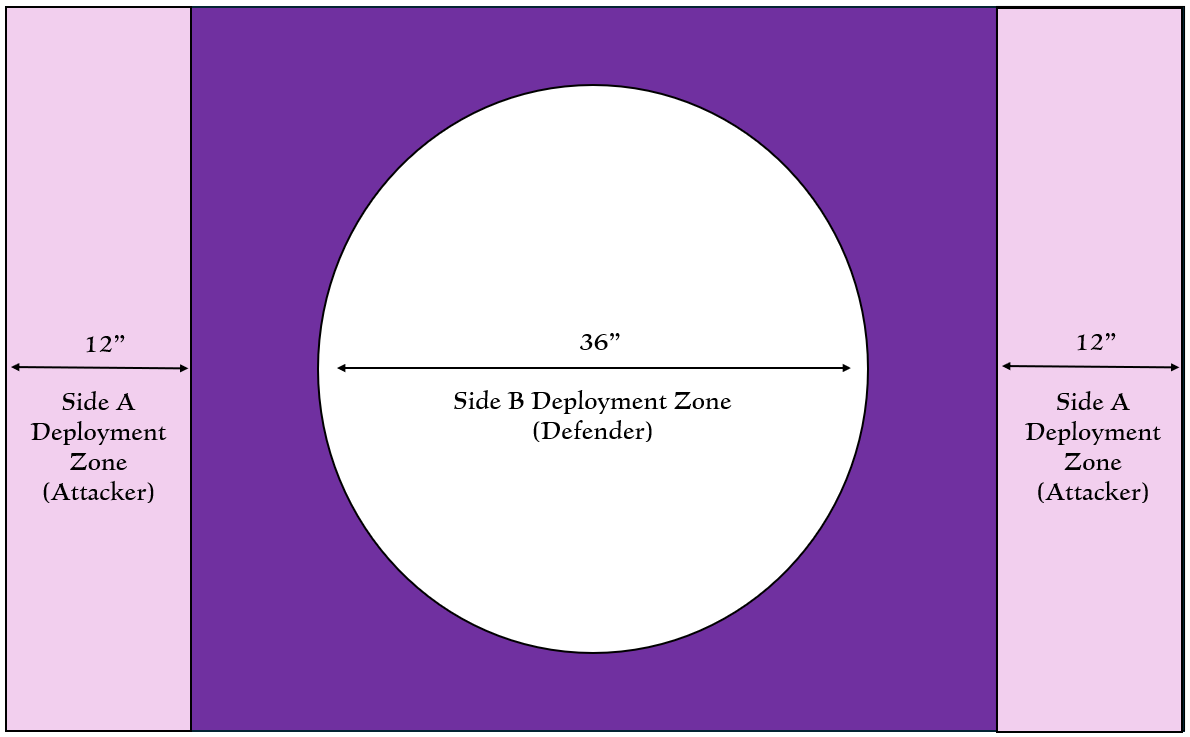
Ambush!
Vanguard Strike
Vanguard Strike
MISSION 1: BLOOD FEUD
VICTORY CONDITIONS
Primary Mission Objectives
Each side gains 2 Victory points for each enemy unit with the Infantry type (other than the Command sub-type) that they have completely destroyed. For any other unit they have destroyed they gain 1 Victory point. A bonus of 1VP is gained for killing any unit with any form of the rule Line (x) or Vanguard (x).
Secondary Mission Objectives
• Slay the Warlord (3)
• Giant Killer (2)
• First Strike (2)
• Last Man Standing (2)
First Tum
The player who deployed first also has the first turn, unless their opponent can Seize the Initiative.
Game Length
This mission lasts for four turns. (Players may choose to play five turns prior to beginning.)
MISSION SPECIAL RULES
Reserves, Counter Offensive, and Seize the Initiative.
MISSION 2: FIRE TIDE
VICTORY CONDITIONS
Primary Mission Objectives
This mission uses four objective markers with a value of ‘4’. Follow the rules for Core Mission Two, the Crucible of War (p. 312, AoD Rulebook for Objectives) for placing and scoring objectives.
Secondary Mission Objectives
• Slay the Warlord (2)
• Giant Killer (3)
• First Strike (2)
• Last Man Standing (3)
First Turn
The player who deployed first also has the first turn, unless their opponent can Seize the Initiative.
Game Length
Variable game length. At the end of the fourth turn, 4+ on a d6 leads to a fifth turn.
MISSION SPECIAL RULES
Reserves, Counter Offensive, and Seize the Initiative.
Isstvan III Mysterious Terrain (optional).
Raging Inferno
In each Start Phase, the active player places an Inferno marker on the table. An Inferno marker is a 3” blast template. The marker scatters 2d6” once it has been placed. Any models underneath the template suffer a Strength 5 AP- hit (vehicles are struck on their rear armour) with the Panic (1) special rule.
Optional: Inferno markers count as Difficult Terrain and remain in play until the beginning of that active player’s next Start Phase.
Burning World (Optional)
Additionally, if an Inferno marker ends up on or in a piece of terrain, then that terrain ignites and becomes an Area of Dangerous Terrain if it were not so already. In addition, for the purposes of the Inferno marker, the terrain piece now blocks line of sight entirely for any model shooting through it. Any unit within this piece of terrain must make a Panic (1) check (not just units underneath the template).
MISSION 3: SHATTER STRIKE
VICTORY CONDITIONS
Primary Mission Objectives
The victory conditions of this mission are tied to taking ground from the enemy. Each player scores ‘4’ Victory points for each scoring unit within the enemy's deployment zone at the end of the game. Scoring units for this mission are any with the Infantry type except for models with the Command sub-type. Any unit with the Line (x) special rule score bonus vicory points equivalent to the value of x.
Note: No, you cannot use a Master of Signals to confer Line (1) for this mission you WAACF!
Secondary Mission Objectives
• Slay the Warlord (2)
• Giant Killer (2)
• First Strike (3)
• Last Man Standing (4)
First Turn
The player who deployed first also has the first turn, unless their opponent can Seize the Initiative.
Game Length
Variable game length. At the end of the fourth turn, 4+ on a d6 leads to a fifth turn.
MISSION SPECIAL RULES
Reserves, and Seize the Initiative.
Isstvan III Mysterious Terrain (optional).
Fog of War
After deploymen, but before the game begins, each army can redeploy a single unit anywhere within their deployment zone. Roll off to see which player has the choice of redeploying first or second.
Night Fight
Turn 1 only: Shooting at a unit greater than 24” away must be made with Snap Shots.
MISSION 4: ONSLAUGHT
DEPLOYMENT
Roll off. The winner may choose to deploy first or second.
Staged Deployment: Rather than deploy their entire army at once, the player who deploys first deploys a single unit to the table, then their opponent deploys a unit, in a particular order as follows. After this has been done the two players continue to alternate deployment of their units until they have both fully deployed (except any units held in reserve, etc). It is entirely possible that one side will run out of units to deploy before the other, if this is the case then the player with the larger number of units may deploy their remainder as they wish after their opponent has ran out.
Special Tactical Objective Deployment
Staged Deployment Order (Battlefield Role)
1st Lords of War and Warlord units
2nd Armour, War-Engine, and Support units
3rd Troops and Heavy Support units
4th Elites and Retinue units
5th High Command and Command units
6th Fast Attack and Recon units
7th All other units not previously covered
If a unit contains models that apply to more than one deployment order (i.e. Characters, Techmarines, etc.), the unit is deployed in the earliest stage (Example: a Command unit attached to a Troops unit would deploy in Step 3, or a Command unit attached to a Retinue would deploy in Step 4). Transports and Heavy Transports with embarked units deploy in the step for that particular unit. Otherwise, deploy in step 7, if no unit is embarked.
VICTORY CONDITIONS
Primary Mission Objectives
After both sides have been deployed, each player places a single objective marker in their opponent's deployment zone and further than 6" away from any table edge, with the player that deployed first placing the first objective.
Victory in the Onslaught mission is based on two factors: the success of the initial onslaught and seizing the enemy's tactical objective in order to split the enemy line.
Onslaught Attack
Any enemy unit destroyed in the first game turn is worth 1 Victory point. This includes via Reactions!
Seize the Tactical Objective
The value of the tactical objective in your opponent’s deployment zone is ‘5’ and can be scored in your Victory sub-phase in Turn 2 and later. These objectives can be scored by units with Vanguard (x) as if they had Line (x). However, for the purposes of this mission, Vanguard points cannot be scored.
Secondary Mission Objectives
• Slay the Warlord (3)
• Giant Killer (3)
• Last Man Standing (4)
First Turn
The player who deployed first also has the first turn, unless their opponent can Seize the Initiative.
Game Length
Variable game length. At the end of the fourth turn, 4+ on a d6 leads to a fifth turn.
MISSION SPECIAL RULES
Reserves, Counter Offensive, and Seize the Initiative.
Isstvan III Mysterious Terrain (optional).
Attrition
At the end of the game, the army that has destroyed the highest number of enemy units gains 2 VP.
MISSION 5: DOMINION
"It is not enough to take from an enemy their life-rather take from them also their places of safety, their allies, their homes and their loved ones. Crush all those in their care, lay their chattels to waste and then drive them alone and naked into the darkness. Take everything they have and bum it for the mere pleasure of seeing the ash crackle between your fingers, and call it nothing more than a beginning." – Jaghatai Khan, Primarch of the White Scars
The bitter fighting on Isstvan III saw the outnumbered loyalists seeking to equal the strategic odds in their favour by dragging their enemies into conflicts in built-up areas and ruined landscapes where the full panoply of their traitor foes could not be brought to bear upon them at once, fighting running battles through corpse strewn streets and shattered habitation blocks, blackened by fire and ash.
VICTORY CONDITIONS
Primary Mission Objectives
After you have set up terrain, the players take it in turns to place D3+2 primary objectives, each of which must be placed in an identifiable piece of terrain (if possible) at least 12" away from any table edge. The objective marker is placed as close to the centre of the terrain piece as possible, and on the ground floor of multi-storey terrain.
Any objectives in the in your opponent’s deployment zone have a value of ‘6’, ‘4’ in no man’s land, and ‘2’ in your own deployment zone.
Secondary Mission Objectives
• Slay the Warlord (3)
• Giant Killer (2)
• First Strike (3)
• Last Man Standing (4)
First Turn
The player who deployed first also has the first turn, unless their opponent can Seize the Initiative.
Game Length
Variable game length. At the end of the fourth turn, 4+ on a d6 leads to a fifth turn.
MISSION SPECIAL RULES
Reserves, Counter Offensive, and Seize the Initiative.
Isstvan III Mysterious Terrain (optional).
Taken by Any Means
All units, with the exception of Paragon, Command and Specialist Sub-Types, and Vehicles, count as having Line (1) (or +1 for those already with Line (x)) for the purposes of capturing objectives in this mission. Any unit with any special rule that does not allow them to score or limits their ability to score do not benefit from this rule (i.e. Heedless, Vanguard, Support Unit).
MISSION 6: EXTERMINATION
VICTORY CONDITIONS
Primary Mission Objectives
The goal of this mission is the complete extermination of enemy forces within the area, with the most tactically valuable targets given the highest priority.
Destroyed enemy units are worth a varying number of Victory points to the player depending on their military value.
Battlefield Roll Victory Points
Lords of War or Warlord 5
High Command 4
Command 3
Elites, Retinue, Armour, Heavy Transports, War-Engine, Heavy Support, and Support 2
Troops, Transport, Recon, and Fast Attack 1
Fortifications 2
Secondary Mission Objectives
• Slay the Warlord (1)
• First Strike (2)
• Linebreaker (2) - If, at the end of the game, a player has at least one entire unit within the opponent’s deployment zone, they score 2 Victory Points. If that unit has the Line (x) rule, the value of x is added in VPs. This can only be scored one time.
First Tum
The player who deployed first also has the first turn, unless their opponent can Seize the Initiative.
Game Length
This mission lasts for four turns. (Players may choose to play five turns prior to beginning.)
MISSION SPECIAL RULES
Reserves, Counter Offensive, and Seize the Initiative.
Isstvan III Mysterious Terrain (optional).
Martial Temper
Any unit making its first assault during the game gains the Hatred (all) special rule if they do not already possess it. This rule only lasts for that player turn, and once a unit has benefitted from this rule it cannot do so again.
Conclusion
So, that’s it for the Battle Missions. Next up, the Legen-wait for it-dary Missions! Stay tuned for more Good Times and War Crimes!
In the meantime, you can check me out Instagram or Facebook!